Setting up a Network
You can install EasyInvoice on several PC's on the same network, then link all to use the same data.
This is what you will need:
- All PC's must be on the same network and have EasyInvoice Installed.
- One of the PC's should be the server and the EasyInvoice folder should be shared with full access to enable the other PC's to access this data.
- You might need your IT to assist you with the sharing of the data and linking your PC's and EasyInvoice.
1. Set Up the Server:
- Install EasyInvoice with the "Standalone/Server" option selected on the PC where the data will be stored and made available to the rest of the PC's.
- Follow the installation instructions here to install EasyInvoice. Should you install EasyInvoice not in the default location, remember the location.
- Then open EasyInvoice and set up you company, follow the steps here.
- Now that EasyInvoice is ready to use on the server, continue to the next step to share the data.
2. Share the Data:
Now you need to make the data available to enable the other PC's (workstations) use the same data.
- Open "My Computer" and locate the folder where EasyInvoice was installed to. The default is "C:\EasyInvoice".
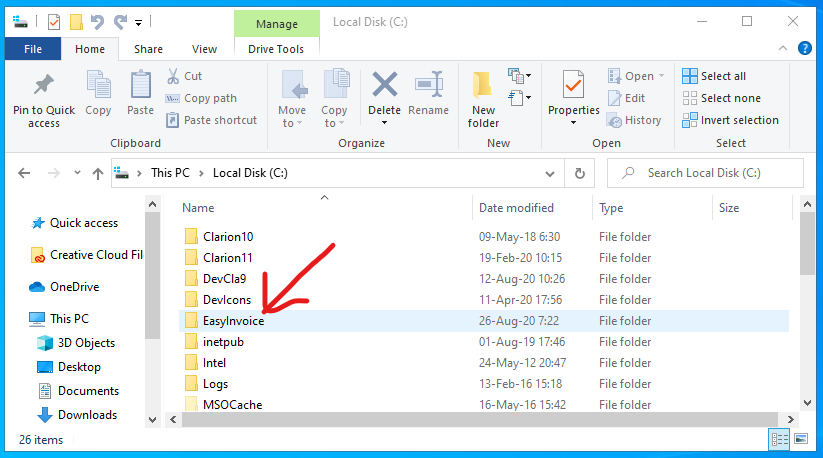
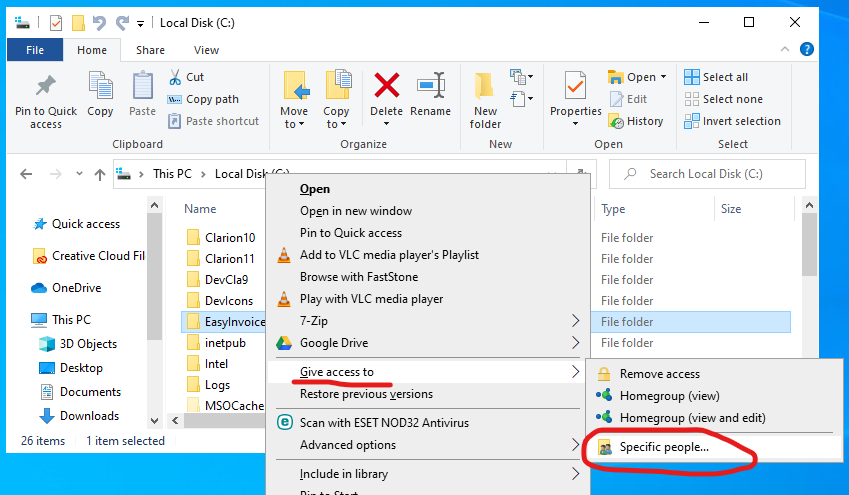
- Right click on the EasyInvoice folder, a menu will open, select "Give access to" then on the sub menu select "Specific people..."
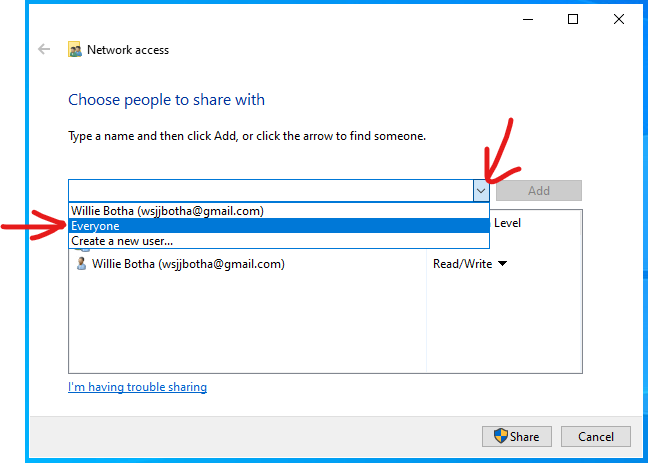
- On the window that opened, select the "Everyone" item from the drop down as indicated below. Then click on the "Add" button.
- You should see a item for "Everyone" in the list. Ensure that the permission level is set to "Read/Write". Then click on "Share".
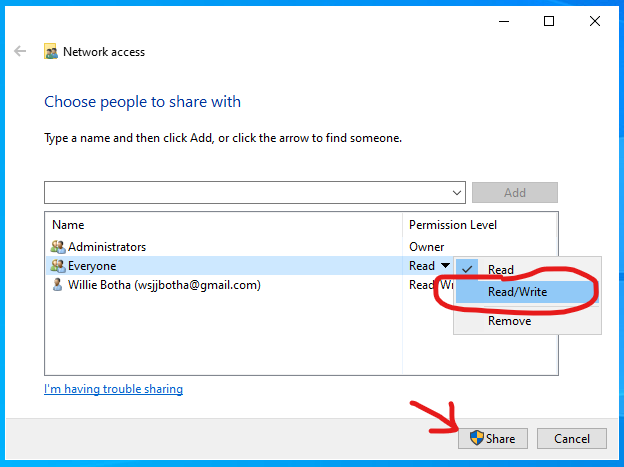
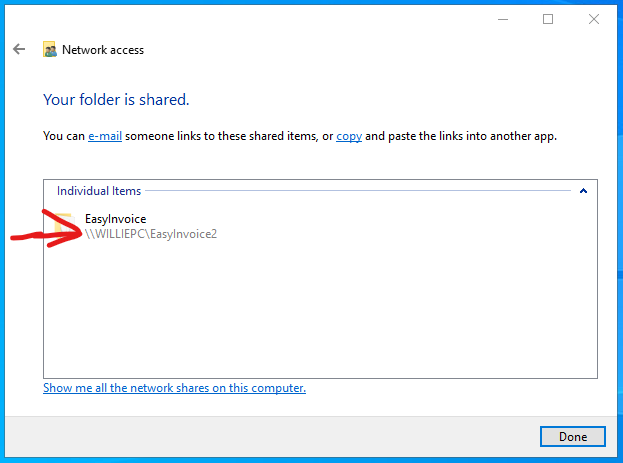
- You should not get confirmation that the "EasyInvoice" folder have successfully been shared. Take note of the path (see the arrow below) to use when linking the other PC's to the Server (where you are sharing the data from). Now you can click on "Done".
Now your should now be shared and available on your network for other PC's to access. Move to the final step below to link a PC to the data on the server.
3. Set Up a Workstation:
Now the final step, linking a PC to the data on the server.
- Go to the PC which will link to the server.
- Install EasyInvoice on the PC. Use the link here to asssit you with the installation.
- Then open EasyInvoice to set up for first use, make sure to select the "Workstation" option when selecting the Installation Type. Follow the instruction here.
- Done, now you can repeat the workstation setup on all PC's on the network.
Created with the Personal Edition of HelpNDoc: Easily create HTML Help documents